





How Airless Sprayers are Revolutionizing Kitchen Cabinet Painting
When painting kitchen cabinets, your chosen method can dramatically impact the final look and quality. Traditional methods like brushes or rollers often result in streaks, uneven finishes, or a longer application process. This is where airless sprayers shine. Their ability to deliver a smooth, professional-grade finish with precision, speed, and minimal mess makes them an ideal choice for homeowners, DIYers, and professional painters alike.
In this “The Power of Airless Sprayers: Revolutionizing Kitchen Cabinet Painting” guide, we’ll explore why airless sprayers are the go-to tool for painting kitchen cabinets, how they work, and what you need to know to achieve the best results. Whether refinishing old cabinets or installing new ones, understanding the power of airless sprayers can transform your project from good to outstanding.
What Is an Airless Sprayer?
An airless sprayer is a high-pressure device that pumps paint directly from the container through a small nozzle. Unlike traditional sprayers that rely on air to atomize the paint, airless sprayers push the paint out using hydraulic pressure. This method creates a fine mist that evenly coats surfaces, providing a flawless finish.
For kitchen cabinets, where smoothness and consistency are critical, airless sprayers ensure a perfect, factory-like finish without the typical brush marks or roller textures. The spray pattern is adjustable, allowing for different coverage widths depending on the area you’re working on.
Benefits of Using Airless Sprayers for Kitchen Cabinets
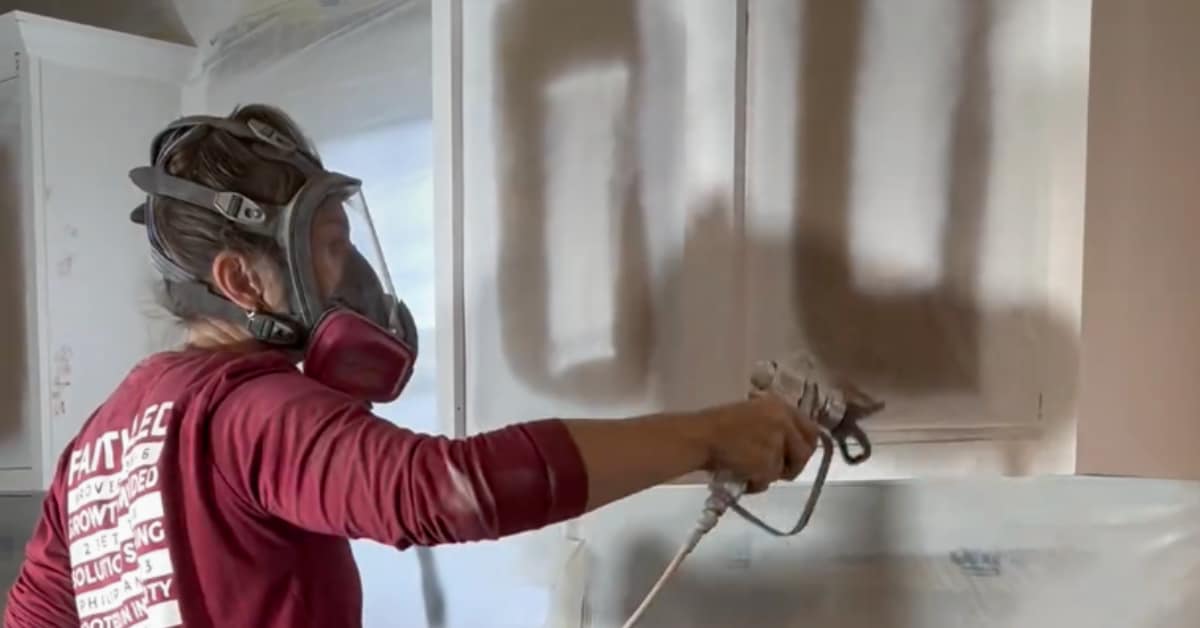
Professional Finish
One of the most significant advantages of airless sprayers is the ability to produce a smooth, uniform finish. Kitchen cabinets are highly visible, and any imperfections in the paintwork will stand out. With airless sprayers, you can achieve a factory-like finish that looks clean and polished, free from streaks, brush marks, or roller textures.
The even application of paint ensures that every inch of the cabinet surface is coated perfectly, which is especially important when dealing with intricate details like raised panels, moldings, or beveled edges.
Speed and Efficiency
Time is often a key factor in any home improvement project, and kitchen cabinet painting is no exception. Airless sprayers allow you to cover large areas quickly, drastically reducing the time needed to complete the job. Compared to brushes or rollers, airless sprayers can cut the painting time in half or even more.
This speed and efficiency are crucial for DIYers and professional painters alike. The faster drying time also means that you can apply multiple coats in a day, leading to quicker project completion without compromising the quality of the finish.
Precision and Control
Airless sprayers offer excellent control over the amount of paint applied. This precision is essential when painting kitchen cabinets, where overspray or uneven coverage can ruin the final look. The sprayer’s nozzle allows you to control the spray pattern, making applying a thin, even coat without excessive build-up in corners or crevices easy.
By controlling the amount of paint output and spray width, you can target tight spaces, corners, and detailed areas of your cabinets while avoiding excessive waste. This level of control also reduces the risk of drips and sags, which are common with thicker layers of paint.
Versatility in Paint Types
Airless sprayers can handle various paint types, from oil-based paints to latex. This versatility makes them ideal for cabinet painting, where different finishes, such as satin, semi-gloss, or high-gloss, are often preferred.
Whether you’re using latex for a soft matte finish or an oil-based paint for a durable, high-gloss look, an airless sprayer can handle it all. The even atomization ensures that the paint’s properties are retained, resulting in a smooth, flawless finish regardless of the paint used.
Minimal Overspray
While all sprayers create some overspray, airless sprayers offer better control than other types. Proper setup and technique can reduce overspray, minimize paint waste, and simplify cleanup. This is especially important for kitchen cabinet projects, as you want to avoid spraying paint onto countertops, appliances, or floors.
Using an airless sprayer also reduces the amount of paint that needs to be masked off, saving time in the preparation phase. Proper technique lets you focus the spray directly on the cabinets, ensuring that only the intended surface is coated.
Key Tips for Using Airless Sprayers on Kitchen Cabinets
While airless sprayers offer numerous advantages for kitchen cabinet painting, some best practices should be followed to ensure the best results.
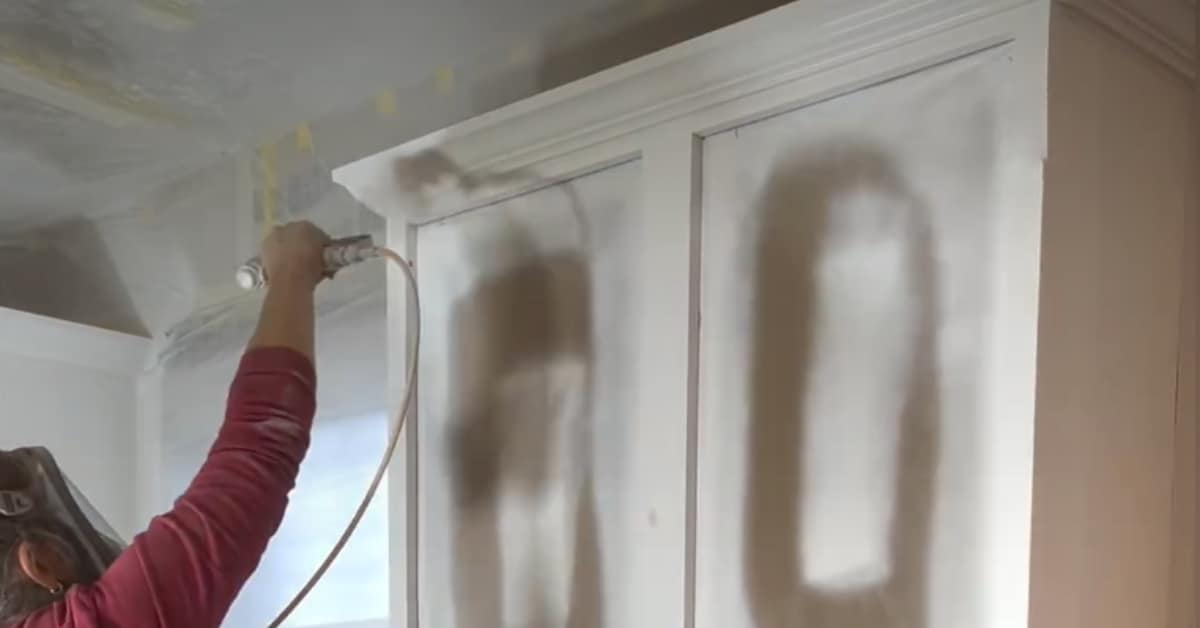
Proper Preparation
Preparation is key when using an airless sprayer. Remove all hardware, such as handles, knobs, and hinges, and clean the cabinets thoroughly to remove grease, dirt, and grime. Sanding the surface to create a smooth base is also essential to help the paint adhere better.
Cover all nearby surfaces you don’t want to paint, including walls, floors, and countertops, with plastic sheeting or drop cloths. Masking off edges and corners will help avoid unwanted overspray and clean the work area.
Prime the Cabinets
Priming the cabinets before applying the final coat of paint is crucial for achieving a smooth, long-lasting finish. Use a high-quality primer compatible with your paint, and apply it with the airless sprayer for an even coat.
Priming helps seal the wood and provides a base to which the topcoat can adhere. The paint may not bond appropriately without priming, leading to chipping or peeling over time.
Practice Spraying Technique
Before you start spraying your cabinets, it’s a good idea to practice on a scrap piece of wood or cardboard. This lets you get a feel for the sprayer, adjust the pressure settings, and perfect your technique. Hold the sprayer at the correct distance (usually 10-12 inches) from the surface, and keep your hand moving steadily to avoid pooling or uneven coverage.
Avoid spraying in a single, concentrated area for too long, as this can cause drips. Instead, use smooth, overlapping passes to ensure even coverage across the entire surface.
Use Multiple Thin Coats
When using an airless sprayer, it is essential to apply multiple thin coats rather than one thick coat. This method lets each layer dry properly, preventing issues like runs, drips, or sagging paint. Two to three thin coats for kitchen cabinets are usually enough to achieve a professional finish.
Be patient between coats, allowing each layer to dry completely before applying the next. This will result in a durable, smooth finish that will withstand a kitchen environment’s daily wear and tear.
Clean the Sprayer Thoroughly
Once you’ve finished your kitchen cabinet painting project, it’s essential to clean the airless sprayer thoroughly. Paint left inside the machine can dry and clog the nozzle, reducing its effectiveness for future use. Follow the manufacturer’s instructions for cleaning, using water or solvent, depending on the type of paint you use.
Proper maintenance ensures your sprayer is in good working condition and ready for the following kitchen cabinet painting project.
Elevating Your Cabinet Painting Project
Airless sprayers have revolutionized how we paint kitchen cabinets, offering unmatched speed, precision, and a flawless finish. Whether a DIY enthusiast or a professional contractor, investing in an airless sprayer can save time, reduce labor, and deliver beautiful, professional-grade results.
With proper preparation, technique, and a high-quality sprayer, you can transform your kitchen cabinets into stunning focal points that look like they were finished in a factory. The power of airless sprayers lies in their ability to make even the most detailed and demanding painting projects more accessible and efficient.
For kitchen cabinet painting and high-quality, durable airless paint sprayers for professional and industrial use, contact TriTech Industries for the best airless paint sprayers on the market today.
Recent Comments